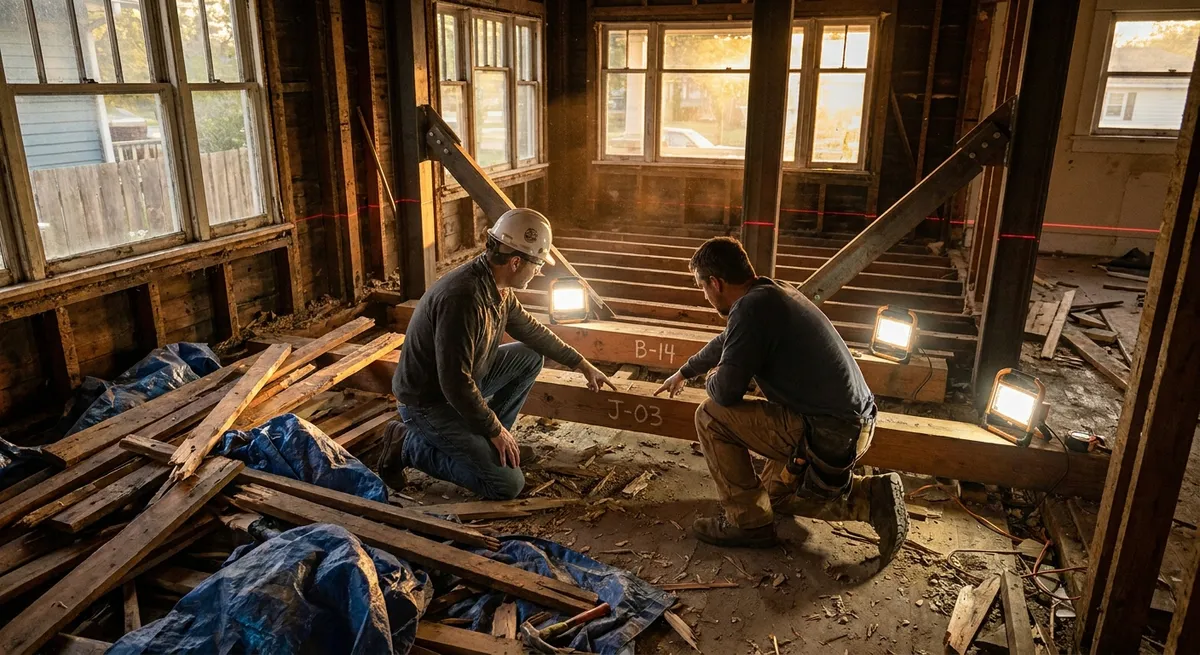
Map the Damage Before You Touch a Tool
Before any demolition, paint, or new materials, professionals build a clear picture of what’s wrong and how far it spreads. That “map” of damage dictates everything that follows—scope, cost, sequencing, and safety.
Start by defining the trigger event: a leak, foundation movement, a roof failure, or long-term moisture. Then walk the home logically from the source outward and from top to bottom:
- Follow gravity and pathways. For water, check directly below and adjacent to the suspected source—ceiling cavities, interior walls, and along joists or beams where moisture can travel.
- Look for patterns, not isolated defects. Multiple hairline cracks radiating from window corners or door frames may indicate settlement or framing movement, not just “old plaster.”
- Use simple diagnostic tools. A non-invasive moisture meter, a good flashlight, and a 4-foot level can tell you a lot about hidden moisture, framing movement, and uneven floors.
- Document everything. Photograph every area, mark up copies of your floor plan, and note must-fix issues versus “opportunistic upgrades” (things you’ll only do if you’re already opening that wall or floor).
- Identify risk zones. Priority areas include structural members (beams, joists, studs), building envelope components (roof, exterior walls, windows), and anything electrical near moisture.
The key principle: No finish work begins until you can explain, in plain language, why the damage happened and how far it extends. If you can’t, you’re still guessing.
Tip 1: Stabilize Structure and Moisture Before Any Cosmetic Work
Professionals always secure the home’s “skeleton” and control moisture before addressing visible finishes. Otherwise, your new work is built on a moving or decaying base.
Address structural stability first
- Shoring and bracing. If you see bowing floors, cracked beams, or sagging ceilings, install temporary shoring (adjustable steel columns, stud braces under joists, etc.) before removing any structural members.
- Prioritize load paths. Look at how loads travel from roof to foundation. Ensure bearing walls, beams, columns, and footings are properly supported before altering or repairing around them.
- Evaluate foundation issues. Horizontal cracks, stepped cracking in masonry, doors that suddenly stick, and sloping floors may signal foundation movement. These problems should be assessed by a structural engineer before you invest in interior finishes.
Get moisture under control
- Stop the source, not just the symptom. Repair roof leaks, failed flashing, plumbing leaks, or poor drainage before touching damaged finishes. A dehumidifier is not a fix; it’s a drying aid.
- Dry to target levels. Use a moisture meter and avoid closing up cavities (with new drywall or insulation) until wood framing and sheathing are within acceptable moisture ranges for your climate and season.
- Upgrade drainage where needed. Redirect downspouts, improve grading away from the foundation, and address standing water issues to prevent recurring moisture damage.
Until structure and moisture are controlled, every dollar spent on paint, trim, and flooring is at heightened risk.
Tip 2: Demolition With Surgical Precision, Not Destruction
In expert restoration, demolition is targeted and deliberate. The goal is to remove all compromised material while preserving as much sound structure and historic detail as possible.
Define “how far back” you need to go
- Remove to clean, solid material. Rotted wood, delaminated subfloor, mold-contaminated drywall, and heavily rusted fasteners must go. Stop only when you reach material that is dry, sound, and structurally reliable.
- Create logical termination points. End cuts at studs, joists, and framing intersections, not in the middle of fields where patching is weak or hard to conceal.
- Segment demolition by assemblies. Think in layers: finishes (paint, trim, flooring), sheathing, framing. Deconstruct one layer at a time so you can assess the next.
Protect what matters
- Dust and debris control. Professionals use zipper door barriers, negative air machines, and floor protection to isolate work zones. At a minimum, seal doorways with plastic, use dedicated pathways, and vacuum with HEPA-filtered tools.
- Save reusable components. Original trim, doors, hardware, and quality millwork can often be carefully removed, labeled, and reused after restoration—especially in older homes where replacement quality is lower.
- Expose systems strategically. Use the opportunity of open walls to access plumbing, electrical, and HVAC that may need upgrading, even if the visible finishes were your original focus.
Effective demolition is really selective deconstruction—preserve everything that’s sound, remove everything that compromises performance.
Tip 3: Rebuild Assemblies to Modern Performance Standards
When pros rebuild after damage, they don’t just “put it back the way it was.” They use the open access to upgrade assemblies—so the restored area is stronger, safer, and more efficient than before.
Think in terms of “building assemblies,” not just surfaces
For a typical exterior wall, consider the full stack:
- Structural frame: Studs or masonry—repair or reinforce, correct misalignment, and replace severely notched or bored studs.
- Sheathing: Ensure it’s fully attached, not water-damaged, and compatible with your chosen weather-resistive barrier (WRB).
- Air and water control layer: This might be WRB wrap, liquid-applied membrane, or taped sheathing—properly lapped, flashed, and sealed.
- Insulation: Install appropriately rated insulation for your climate (R-values per local codes) while minimizing gaps and compression.
- Interior air barrier and finish: Drywall with sealed penetrations, properly taped joints, and correct fastener spacing.
Use this chance to fix code and safety issues
- Upgrade wiring in opened walls. Add grounded circuits, correct overloaded runs, and bring receptacle spacing and GFCI/AFCI protection closer to current code, even if your jurisdiction allows “grandfathering.”
- Improve fire blocking and draft stopping. Seal vertical chases and penetrations between floors with fire-rated materials where appropriate to slow fire and smoke spread.
- Correct under-sized framing or improper modifications. Sister damaged joists, add headers where large openings exist, and restore proper load-bearing paths where past DIY work compromised structure.
The professional mindset: If you can touch the assembly, you should improve it, not just replicate what failed.
Tip 4: Sequence Trades and Inspections Like a Pro
Restoration and renovation rarely involve a single discipline. Poor sequencing is where many projects derail—leading to rework, damage to new work, and inspection failures.
Plan the order of operations before starting
A typical interior restoration sequence might look like:
Structural and moisture corrections (shoring, foundation, roof, leak repairs, drying)
Selective demolition and debris removal
Rough framing repairs and modifications
Mechanical rough-ins (plumbing, electrical, HVAC, low-voltage)
Insulation and any required air/vapor barrier work
Rough-in inspections (per local code)
Drywall and plaster work (hang, tape, finish)
Priming and first-coat painting
Flooring installation (hard flooring before final paint touch-ups; carpet usually last)
Trim, doors, cabinetry, and built-ins
Finish electrical, plumbing fixtures, hardware
Final paint, caulking, and detail work
Final inspections and punch list completion
Coordinate access and protection between trades
- Avoid trade stacking. Too many trades in one small area increases mistakes, damages, and delays. Stagger work where possible.
- Protect new installations. Cover new flooring and stair treads, pad doorways, and establish “no-go” zones for heavy tools or materials.
- Schedule inspections at natural checkpoints. Ensure framing, mechanicals, and insulation are fully complete and documented before calling for inspections to avoid multiple trips and rework.
Good sequencing turns a complex restoration into a controlled process instead of a constant firefight.
Tip 5: Finish With Durable, Repairable Materials and Clear Maintenance Plans
The last phase of restoration is where the home’s appearance returns—but professionals also think about how the finished space will age, be maintained, and be repaired in the future.
Choose materials for performance and serviceability
- Prioritize moisture-tolerant materials in vulnerable areas. Use cement board or fiber-cement in wet zones, mold-resistant drywall in humid areas, and appropriate tile backer systems instead of generic drywall.
- Select finishes that can be touched up or refinished. Quality paints with good hide and washability, solid or engineered wood flooring that can be refinished, and modular tile patterns that allow partial replacement all extend life.
- Use compatible systems. Buy primers, finishes, and sealants designed to work together. Manufacturer system warranties often depend on using matched components.
Build a long-term maintenance roadmap
- Document what you did and where. Record product types, colors, batch numbers, and installation dates. Keep photos of assemblies before they were closed up.
- Identify inspection intervals. For example: annual roof and flashing checks, semiannual gutter cleaning, periodic re-caulking of wet areas, and regular HVAC filter replacement.
- Set early-warning thresholds. Know what small signs indicate emerging issues—hairline cracks that widen, recurring musty smells, or minor floor cupping near exterior doors.
Restoration isn’t “done” when the paint dries; it’s successful when the repaired areas stay solid, dry, and functional for decades with predictable, minimal upkeep.
Conclusion
Professional-grade restoration is less about dramatic before-and-after photos and more about everything that happens in between: accurate diagnosis, structural and moisture control, disciplined demolition, upgraded assemblies, smart sequencing, and durable finishes. When you apply these five tips—stabilize structure and moisture, demolish surgically, rebuild to modern performance standards, sequence trades and inspections properly, and finish with durable, maintainable materials—you transform restoration from a cosmetic patch job into a long-term upgrade of your home’s resilience.
Approach your next repair with this mindset, and you’ll spend less time fixing repeat problems and more time living in a home that quietly performs the way it should.
Sources
- [U.S. Department of Housing and Urban Development – Residential Rehabilitation Inspection Guide (PDF)](https://www.hud.gov/sites/documents/REHABINSPECTIONGUIDE.PDF) - Detailed federal guidance on evaluating and planning residential rehabilitation projects
- [Building America Solution Center – U.S. Department of Energy](https://basc.pnnl.gov/) - Best practices for building assemblies, moisture control, and energy-efficient retrofits
- [Federal Emergency Management Agency (FEMA) – Homeowner’s Guide to Retrofitting](https://www.fema.gov/sites/default/files/2020-08/fema_p312.pdf) - Strategies for making homes more resilient to future damage, with structural and moisture-control insights
- [University of Minnesota Extension – Managing Moisture and Mold in Homes](https://extension.umn.edu/indoor-air-quality/moisture-mold-and-your-home) - Research-based guidance on moisture, mold, and building durability
- [National Park Service – Preservation Briefs](https://www.nps.gov/orgs/1739/preservationbriefs.htm) - Technical recommendations for repairing and upgrading historic building components without compromising performance