Build from the Bones: Assess Structure, Moisture, and Systems First
Professionals never start with aesthetics; they start with the skeleton and the “lifelines” of the house. Before you think about new cabinets or premium tile, you need a clear picture of what’s happening behind walls and under floors.
Begin with a structural and systems walk-through. Look for sagging floors, cracked or bowing foundation walls, doors that don’t close square, and stair treads that feel spongy—these can indicate framing or foundation issues. In basements and crawl spaces, check for efflorescence (white, chalky deposits), standing water, or heavy musty odors, all signs that moisture is intruding where it shouldn’t.
Next, evaluate your mechanical systems: electrical panel age and capacity, presence of aluminum wiring or knob-and-tube, visible rust on plumbing lines, corroded shutoff valves, and aging HVAC components. An overloaded electrical system or undersized HVAC can quickly undermine a beautiful restoration.
Professionals typically sequence corrections as: structural and moisture, then mechanicals, then insulation and air sealing, then finishes. This order keeps you from opening the same wall twice. If your budget is limited, prioritize anything related to safety and long-term durability—foundation stabilization, roof and flashing issues, active leaks, and outdated or unsafe wiring. Cosmetic work can wait; a compromised structure or wet building envelope can ruin it all.
Treat Water as Your Primary Enemy: Control It Outside, Then Inside
Ask any restoration contractor: water is the most destructive, underestimated force in a house. It doesn’t just cause visible stains—it compromises framing, rots subfloors, fosters mold, and accelerates failure in finishes and mechanical systems. Pros build a layered defense system, starting outside the home and working inward.
Begin with site grading and drainage. The ground around your foundation should slope away at roughly 6 inches over the first 10 feet, channeling water away from the structure. Ensure gutters are properly sized, not clogged, and extended at least 4–6 feet away from the foundation using downspout extensions or underground drains. In older homes especially, clogged or broken footing drains can be a hidden cause of chronic basement moisture.
Once exterior water management is addressed, move to building envelope details. Inspect roof flashings around chimneys, vent stacks, and wall transitions; these small pieces of metal or membrane are common leak points. Check window and door trim for gaps and failed caulking, especially on wind-driven rain exposures. In masonry homes, look for cracked mortar joints, missing brick, or deteriorated stone where water can penetrate.
Inside, focus on controlling humidity and condensation. Bathrooms should have properly ducted exhaust fans—not just “vented” into an attic. Clothes dryers must vent to the exterior with smooth-walled ducting. In basements, consider a properly sized dehumidifier and, when necessary, vapor barriers in line with your climate conditions. Professionals often use moisture meters and infrared cameras to identify hidden damp areas before they become expensive repairs.
Preparation Is 80% of the Work: Surfaces, Substrates, and Sequencing
The biggest difference between amateur and professional results is not the brand of paint or tile—it’s the time spent on preparation and sequencing tasks correctly. Pros understand that surfaces only perform as well as the substrate underneath them.
For walls and ceilings, this means repairing cracks and holes with the right materials (for example, setting-type joint compound for deeper repairs), properly taping seams, and sanding to a consistent profile before priming. On older plaster, professionals may re-anchor loose sections with plaster washers, then skim-coat to create a monolithic surface instead of endlessly patching. Primers are matched to the surface—stain-blocking primers for water or smoke damage, bonding primers for slick or previously glossy surfaces.
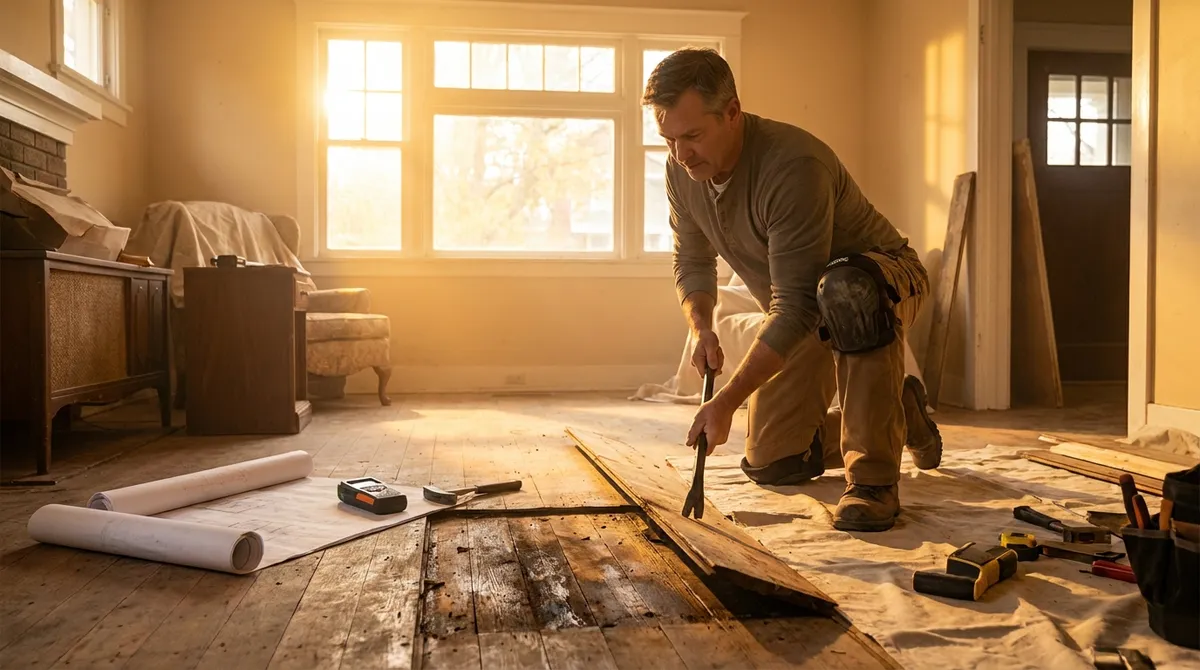
Floor prep is equally crucial. Before installing any new flooring, pros check subfloor thickness, deflection (how much the floor flexes between joists), and flatness. Tile requires a more rigid, flatter base than many homeowners realize; installing over a flexing or uneven floor leads to cracked grout and tile. This is why professionals often add underlayment such as cement backer board or decoupling membranes and level uneven areas with self-leveling underlayment.
Sequencing matters. Dust-generating work—demolition, framing, drywall sanding—comes before high-value finishes and mechanical trim-outs. Finishes like hardwood flooring, delicate tile, and final paint should be among the last steps, after heavy trades and inspections are complete. On multi-room or whole-house projects, pros work “clean to dirty” and “top to bottom,” finishing upper stories before lower ones to reduce repeated cleaning and damage.
Preserve Character While Upgrading Performance
A well-executed restoration respects the home’s original character while improving its safety, efficiency, and function. Professionals know where to preserve, where to replicate, and where to modernize without visually disrupting the overall story of the house.
Start by identifying genuine character-defining elements: original wood windows, solid wood doors, millwork and trim profiles, plaster details, built-in cabinetry, fireplace surrounds, and stair parts. Replacing these indiscriminately with off-the-shelf modern materials can erase decades of craftsmanship and reduce long-term value. Often, these elements can be restored more economically than truly high-quality replacements.
For example, original wood windows can often be repaired, weatherstripped, and combined with interior or exterior storm windows to dramatically improve efficiency while maintaining historic proportions and details. Old solid wood doors can be stripped, repaired, and refit with modern hardware and weatherstripping rather than replaced with hollow-core units. Baseboards and casings can be carefully removed and reinstalled after wall work, or custom-milled to match in areas requiring new material.
At the same time, pros discreetly upgrade performance: adding insulation where appropriate, using air sealing at penetrations and transitions, upgrading wiring in existing wall cavities, and using modern plumbing lines behind historically accurate fixtures. Where new materials are visible, they pay attention to scale, profiles, and joinery so that additions feel like natural evolutions of the house, not jarring insertions. The goal is to leave the home safer, more efficient, and more comfortable—without sacrificing the architectural language that makes it unique.
Plan Like a Contractor: Budget, Contingency, and Quality Control
Professional results demand professional-level planning. Contractors don’t simply “start renovating”; they work from a defined scope, schedule, and budget, with clear allowances and contingencies. Homeowners who adopt the same mindset avoid many of the cost overruns and frustrations that plague DIY projects.
Begin by writing a detailed scope of work, room by room and system by system. Specify not just “new kitchen,” but which walls are moving (if any), what happens with electrical circuits, ventilation upgrades, cabinet construction quality levels, countertop material, and lighting layout. The more precise your scope, the easier it is to compare bids and control costs.
Use realistic budgeting strategies. Pros typically include a contingency—often 10–20% of the total project cost—for unforeseen conditions, especially in older homes where hidden issues (like undersized framing or old wiring concealed in walls) are common. Prioritize spending on structure, envelope (roof, windows, exterior walls), and mechanicals before allocating funds to luxury finishes. A modest countertop over a robust, dry, and well-wired structure will always outlast stone installed over unresolved problems.
Quality control doesn’t end when a contractor leaves for the day. Professionals inspect at key milestones: after demolition, after rough plumbing and electrical, after insulation and air sealing, after drywall, and before final finishes. Whether you’re managing trades or doing the work yourself, build in these checkpoints. Use punch lists at the end of each phase to capture defects, incomplete items, and questions before moving ahead. Document everything with photos, notes, and saved product data sheets so future maintenance and repairs are informed by what’s been installed.
In the end, adopting a professional planning mindset—detailed scope, realistic budget with contingency, and structured quality checks—turns a chaotic renovation into a manageable, controlled restoration process.
Conclusion
Professional-grade home restoration isn’t about expensive materials or trendy design—it’s about disciplined assessment, rigorous moisture and structural control, meticulous preparation, respect for original character, and project management that anticipates problems before they surface. By thinking like a contractor and working from the “bones” outward, you protect your investment, extend the life of your home, and achieve results that look good not just on reveal day, but decades down the line. Approach your next project with these pro strategies, and your home will reward you with greater durability, comfort, and timeless appeal.
Sources
- [U.S. Department of Housing and Urban Development – Rehab a Home Guide](https://www.hud.gov/program_offices/comm_planning/housingrehab) - Overview of housing rehabilitation considerations, including safety, systems, and planning
- [U.S. Environmental Protection Agency – Moisture Control Guidance](https://www.epa.gov/mold/moisture-control-guidance-building-design-construction-and-maintenance) - Detailed guidance on preventing and managing moisture problems in buildings
- [National Park Service – Preservation Briefs](https://www.nps.gov/orgs/1739/preservation-briefs.htm) - Authoritative guidance on preserving and rehabilitating historic building materials and features
- [U.S. Department of Energy – Air Sealing Your Home](https://www.energy.gov/energysaver/air-sealing-your-home) - Best practices for improving envelope performance and reducing moisture and energy issues
- [Old House Journal – Window Restoration vs. Replacement](https://www.oldhouseonline.com/repairs-and-how-to/old-house-window-restoration/) - In-depth discussion on when and how to restore original windows instead of replacing them