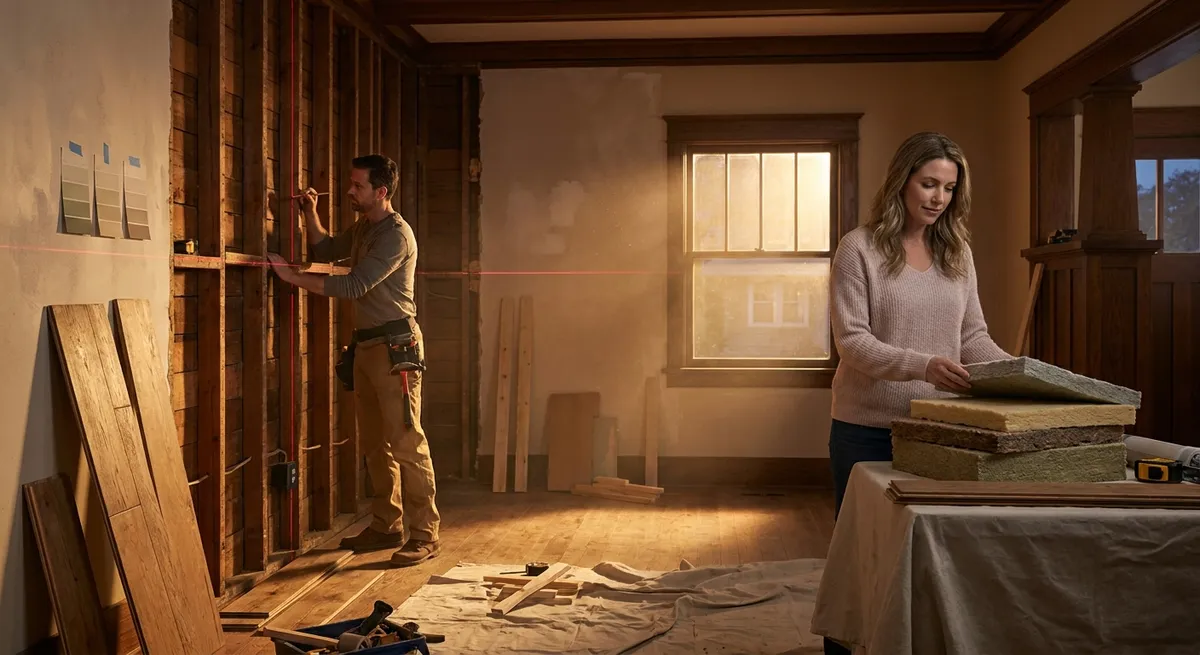
Start With a Forensic Assessment, Not a Mood Board
Before a contractor talks cabinets or paint colors, a professional restoration team wants data: what’s working, what’s failing, and what’s about to fail. That “forensic” mindset is what separates true restoration from surface‑level remodeling.
Begin with a structured assessment of the following:
- Structure: Look for sagging floors, cracked or displaced foundation walls, out‑of‑level door frames, and signs of previous structural modifications (cut joists, over‑spanned beams, notched studs). A structural engineer’s visit can be money well spent before major wall removals or additions.
- Water management: Identify roof leaks, staining on ceilings, soft flooring, efflorescence on foundation walls, and musty odors. Water is usually the root cause of long‑term damage, mold, and insect activity.
- Building envelope: Check window and door seals, missing or damaged flashing, poor attic insulation, unsealed penetrations, and gaps in siding or trim that allow air and moisture in.
- Systems: Review the age and condition of electrical panels, wiring, plumbing pipes (especially galvanized steel or polybutylene), HVAC equipment, and ductwork.
- Health and safety: Assess for lead paint (common in homes built before 1978), asbestos (older flooring, pipe insulation, some textured ceilings), mold, and insufficient ventilation.
Document everything with photos and notes room by room. Then prioritize repairs in this order:
Life safety (structural risks, electrical hazards, gas leaks, lead/asbestos)
Water intrusion and moisture control
Building envelope and mechanical systems
Functionality and layout improvements
Finishes and aesthetics
This sequencing keeps you from spending heavily on finishes in areas still vulnerable to leaks, movement, or future tearing open for system upgrades.
Tip 1: Pair Every Aesthetic Upgrade With a Hidden Performance Win
A seasoned restoration contractor never opens a wall, floor, or ceiling without improving at least one “invisible” system at the same time. Once surfaces are closed up, you’ve lost your cheapest opportunity to elevate your home’s performance.
When you’re renovating:
- Behind new kitchens and baths:
- Upgrade supply lines from older materials (e.g., galvanized) to modern PEX or copper.
- Replace old shutoff valves and install accessible, labeled shutoffs for sinks, toilets, dishwashers, and ice makers.
- Add proper backing and blocking for heavy cabinets, grab bars, or future accessibility modifications.
- Correct venting issues and ensure drains are properly sized and sloped.
- During flooring replacements:
- Inspect subflooring for rot, delamination, and deflection. Replace damaged sections instead of “sistering” over obviously compromised material.
- Add acoustic underlayments in multi‑story homes to reduce sound transfer.
- Install or upgrade vapor barriers in basements or over slabs, following manufacturer and code guidance.
- When repainting or re‑siding exteriors:
- Verify and, if necessary, replace housewrap or water‑resistive barriers.
- Correct flashing details at windows, doors, deck ledgers, and roof‑wall intersections.
- Add weep details where required so trapped moisture can escape instead of rotting sheathing.
- Any time you open an attic or crawlspace:
- Air‑seal penetrations (wiring, plumbing, chases) with appropriate sealants or gaskets.
- Upgrade insulation to modern R‑value standards and ensure proper ventilation (soffit, ridge, or gable vents) to minimize condensation and ice dams.
Thinking “what can we quietly upgrade in here before we close it up?” turns every cosmetic project into a building‑performance project—without massive cost increases.
Tip 2: Treat Moisture and Air as Your Primary Enemies
From a professional standpoint, most long‑term failures trace back to uncontrolled moisture and uncontrolled air movement. Both carry destructive loads: water carries decay and mold; air carries heat, cold, and humidity into places it doesn’t belong.
Focus on these key controls:
Exterior water management
- Roofing: Make sure there’s a continuous water‑shedding path—from shingles/metal, to underlayment, to flashing, to gutters, to downspouts, to grade. Check valley flashing, kick‑out flashing (where roofs intersect walls), and penetrations (vents, chimneys, skylights).
- Gutters and grading: Extend downspouts well away from foundation walls. Adjust grading so soil slopes away from the house at least 6 inches over 10 feet where possible. Poor drainage is a leading cause of foundation and basement issues.
- Decks and balconies: Ensure ledgers are correctly flashed and structurally connected, and that surfaces have positive slope away from the home. Water trapped against siding or ledgers leads to hidden rot and structural failure.
Interior moisture and air control
- Bathroom and kitchen ventilation: Replace noisy, underpowered fans with properly sized, ducted fans that vent outdoors—not into attics. Consider timer switches or humidity sensors for consistent use.
- Basements and crawlspaces:
- Install continuous ground vapor barriers in crawlspaces and consider conditioned or encapsulated crawlspace strategies where appropriate.
- In basements, use rigid foam insulation against foundation walls where condensation is a risk; avoid finished walls directly against cool masonry without proper detailing.
- Air sealing: Seal around windows, doors, sill plates, and utility penetrations. Use caulks and foams appropriate to each joint and material. Air typically leaks most at the top and bottom of the building (stack effect), so prioritize attics and basements.
When you target moisture and air with the same seriousness as color schemes, your renovated spaces stay stable, clean, and comfortable far longer—and you dramatically lower the risk of hidden mold and rot.
Tip 3: Align Structural Changes With Real Load Paths
Opening up spaces—removing walls, raising ceilings, expanding openings—is one of the most attractive renovation goals. Done poorly, it’s also one of the most damaging. Professionals work from the concept of load paths: how the weight of the structure and live loads (people, furniture, snow) are transferred down to the foundation.
Before altering structure:
- Verify whether a wall is load‑bearing.
Look at framing direction in the basement or attic, review any existing plans, and bring in a structural engineer if there’s uncertainty. Some non‑bearing walls may still stabilize the structure or carry point loads.
- Size new beams and supports correctly.
Replacement beams (steel or engineered lumber) must be properly engineered for span, load, and deflection limits. Undersized beams may not fail immediately—but increased sag, cracked finishes, or doors that don’t close appear over time.
- Carry loads all the way to the foundation.
Posting a beam down onto a non‑bearing wall or inadequate footing is a common amateur mistake. Ensure posts land on solid, continuous support—either existing structural elements or new footings sized per code and engineering.
- Respect lateral and shear resistance.
Even if a wall isn’t carrying vertical loads, it may contribute to lateral resistance against wind or seismic forces. Removing it without adding alternative bracing (shear walls, moment frames, or hardware) may weaken overall stability.
- Coordinate structure with mechanical systems.
Plan beam locations and new walls with your HVAC, plumbing, and electrical runs in mind. Professionals design chases and soffits on paper first, reducing field improvisation that leads to notched joists or compromised members.
Always get engineered solutions stamped where required by code or where significant load changes are involved. The price of good engineering is small compared to correcting a compromised structure or dealing with cumulative movement damage in the years after a renovation.
Tip 4: Renovate With Codes, Safety, and Future Regulations in Mind
A professional restoration doesn’t merely meet today’s minimum code—it anticipates what will still feel safe, efficient, and compliant years down the road. Building codes are minimum standards, and they evolve. Renovations are the ideal time to get ahead of them.
Key areas to address:
- Electrical safety and capacity:
- Replace outdated panels known for safety issues (e.g., some Federal Pacific, Zinsco).
- Add sufficient circuits for kitchens, baths, home offices, EV chargers, and workshops—think about where demand may grow.
- Bring receptacle spacing, GFCI, and AFCI protection up to current code, especially in wet or sleeping areas.
- Egress and fire safety:
- Ensure basement bedrooms meet egress requirements with properly sized windows or wells.
- Add interconnected, hard‑wired smoke and CO detectors with battery backup in required locations.
- When opening walls or ceilings, use fire‑blocking and fire‑caulking where the code requires to slow fire and smoke spread.
- Energy efficiency and comfort:
- Update windows and doors to modern performance standards where budget allows, but prioritize air sealing and insulation first—they often deliver better payback.
- Use renovation to formalize zoning in HVAC systems or add smart controls, improving comfort and reducing energy waste.
- Evaluate whether your renovation triggers local energy code requirements (e.g., specific insulation or blower‑door targets).
- Accessibility and aging‑in‑place considerations:
- Frame for future blocking behind showers and toilets for grab bars.
- Design at least one no‑step entry if grade allows.
- Widen critical doorways and avoid unnecessary level changes in new layouts.
Even if you don’t need them now, it is inexpensive at renovation time to:
Treating safety and code as a design input rather than a checkbox protects you legally, improves resale, and makes your home more resilient to future rule changes.
Tip 5: Build a Maintenance‑Ready Home, Not a Fragile Showpiece
Professionals don’t just ask “How will this look on day one?” They ask, “How will this perform—and be maintained—on day 3,650?” Your renovation should deliberately reduce the effort, cost, and risk required to keep your home in top shape.
Design with maintenance in mind:
- Choose materials with clear care paths.
- Favor durable, repairable materials (wood, tile, high-quality laminates, fiber‑cement, quality vinyl, stone) over delicate finishes that require specialized products or frequent refinishing.
- Use exterior materials rated for your climate and exposure (sun, salt, freeze‑thaw cycles).
- Improve access to critical systems.
- Install accessible access panels for shutoff valves, cleanouts, and mechanical equipment you know you will eventually need to reach.
- Plan service clearances around furnaces, water heaters, and electrical panels, not just enough space to squeeze them in.
- Design for water events.
- Consider flood‑tolerant finishes in basements or lower levels (e.g., tile, certain vinyls, removable baseboards, raised outlets).
- Install leak detectors in risk areas (under sinks, near water heaters, laundry rooms) that can alert you early.
- Standardize where possible.
- Use consistent trim profiles, paint sheens, and hardware finishes across spaces so repairs and touch‑ups are simpler and less noticeable.
- Choose fixtures with readily available replacement parts.
- Document your renovation as you go.
- Take labeled photos of walls, ceilings, and floors before they’re closed—showing plumbing lines, wiring routes, blocking, and framing.
- Keep a digital folder with manuals, product data, paint codes, tile specs, and warranty documents.
A home that is easy to maintain ages gracefully, holds value better, and costs less to own. Strategic renovation choices today can prevent future owners—including you—from having to “break” the house to fix routine issues.
Conclusion
Renovation is one of the few times you can dramatically alter the trajectory of your home’s performance: structurally, mechanically, and financially. Approaching it like a professional means treating every cosmetic upgrade as an opportunity to fix underlying weaknesses, control moisture and air, align loads correctly, surpass minimal code, and design for easy maintenance.
Instead of asking only, “Will this look good?” start asking:
- What hidden problems can we discover and resolve while we’re open?
- How can we make this space more robust against water, time, and use?
- What can we do today so the next repair is simpler, safer, and cheaper?
That mindset shift—from decorating to rebuilding wisely—is what turns an ordinary renovation into a durable restoration that serves you well for decades.
Sources
- [U.S. Department of Housing and Urban Development – Residential Rehabilitation Inspection Guide](https://www.hud.gov/program_offices/comm_planning/affordablehousing/training/web) – Detailed guidance on evaluating and prioritizing repairs in existing homes
- [U.S. Department of Energy – Weatherization and Energy Efficiency for Existing Homes](https://www.energy.gov/energysaver/weatherize/air-sealing-your-home) – Best practices for air sealing and moisture control during renovations
- [Federal Emergency Management Agency (FEMA) – Homeowner’s Guide to Retrofitting](https://www.fema.gov/emergency-managers/risk-management/structural-retrofit/homeowners-guide-retrofitting) – Strategies to reduce flood and hazard risks when modifying existing structures
- [National Fire Protection Association (NFPA) – Smoke Alarms in U.S. Home Fires](https://www.nfpa.org/education-and-research/home-fire-safety/smoke-alarms) – Evidence-based recommendations on smoke and CO alarm placement and upgrades
- [American Society of Home Inspectors (ASHI)](https://www.homeinspector.org/Resources/Articles) – Articles on common structural, moisture, and system defects discovered in existing homes